


The Artist
Anne Jorinde Kuiper
My love for watercolour started when I was travelling through South East Asia. So many stories and colours to capture! I often wanted to grasp the essence of a day or place in one journal spread – with a collage of different illustrations and typical phrases.

Step 1
I start my sketch lightly, drawing loose boxes. Equally, I divide the space between illustrations and text. I stick to basic shapes: this part is purely about getting an idea of the composition.

Step 2
I work on my sketch in more detail. I Shape my illustrations and make sure that my letters are upright – even though their box is tilted. When you tilt the letters along with their box, it often look like they are toppling over.

Step 3
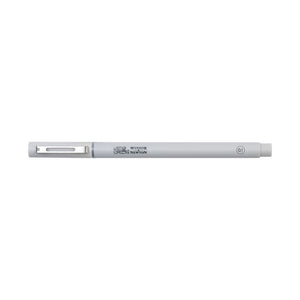
I trace my sketch with a fineliner and erase the pencil. When travelling, I often don’t erase very well. Pencil lines peeping through can look quite charming plus it saves time and you don’t damage your paper by erasing. But be careful, because watercolour paint ‘locks’ the graphite. Once painted over, you can’t erase it. Also, too much graphite on the paper can make the colours look dingy

Step 4
Time to add colour! I build my watercolour in layers: light shades first. My workflow often moves from part to part, so I build some colour layers within an illustration before I start working on the next. In the process, I often mix my pigments so elaborately that my palette turns into a muddy mix! Still, I love the subtle, natural and earthy look of mixed pigments.

Step 5
The look of a watercolour can change dramatically when it dries. So I make sure that I add an extra layer of darker shades to restore the intensity. On a dry layer, it’s also easier to apply smaller details like dots or stripes. These won’t blend in with the layer below.

Step 6
It’s all about the details! I blacken out the letters with a fineliner and fill any outstanding white space with some final, extra details to bring the whole collage together.
![W&N COTMAN WATER COLOURS H/P LEMON YELLOW HUE [COMPOSITE] 094376901658](http://uk.winsornewton.com/cdn/shop/files/10262.jpg?crop=center&v=1714069205&width=20)
![W&N COTMAN [SWATCH] LEMON YELLOW HUE](http://uk.winsornewton.com/cdn/shop/files/2922.jpg?crop=center&v=1714069205&width=20)

![WN PROMARKER COOL GREY 3 [COMPOSITE] 884955041406](http://uk.winsornewton.com/cdn/shop/files/77586.jpg?crop=center&v=1741263144&width=20)
![W&N DESIGNERS GOUACHE 14ML ZINC WHITE [COMPOSITE] 50947195](http://uk.winsornewton.com/cdn/shop/files/10437.jpg?crop=center&v=1717586081&width=20)
![W&N DESIGNERS GOUACHE [SWATCH] ZINC WHITE](http://uk.winsornewton.com/cdn/shop/files/3022.jpg?crop=center&v=1714143175&width=20)
![W&N GALERIA ACRYLIC TUBE 60ML TITAN WHITE 08 [COMPOSITE] 094376914061](http://uk.winsornewton.com/cdn/shop/files/9396.jpg?crop=center&v=1714072593&width=20)
![W&N GALERIA [SWATCH] TITANIUM WHITE](http://uk.winsornewton.com/cdn/shop/files/3097.jpg?crop=center&v=1714072593&width=20)

![W&N BLACK FINELINER LS 0.1 [CAP ON]](http://uk.winsornewton.com/cdn/shop/files/64128.jpg?crop=center&v=1736866967&width=20)
![WN COTMAN 8 PC FLORAL POCKET BOX [OPEN WITH STICKER] 884955081129](http://uk.winsornewton.com/cdn/shop/files/132624.jpg?crop=center&v=1761839596&width=20)
![W&N COTMAN WATERCOLOUR 8HP FLORAL POCKET SET [FRONT]](http://uk.winsornewton.com/cdn/shop/files/97499.jpg?crop=center&v=1760698026&width=20)